Showing posts with label DIY project. Show all posts

Wednesday, April 10, 2013

looking past the mess at the future plans for the homestead


The landscape on the homestead currently looks more like a logging operation than a farm.  In a sense, that is what it has been, as we slowly clear away the Norway Maples that have taken over the orchard (those Norway Maples haunt me, I feel like they are mentioned in every single post!).

Ira and Ian visited from Montreal in March and helped a bit with the cutting
Piles like this one dot the property, we tried to burn one, but the wood is too green

It's sometimes hard to see past the mess, but we quickly use our imaginations to remember our dreams and plans we have for the homestead, and as you can see, we are far from troubled ;)! We just tell ourselves that the endless mountains of brush aren't clutter :) they are resources, materials that will be used for the various projects we have planed: trails, fences, lumber, sauna, outdoor shower... They will soon disappear as these projects come to life.  


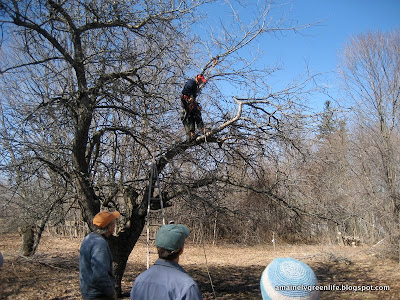
Just yesterday, with the beautiful sunny weather, Alex and his friend John practiced some tree climbing techniques, to be able to begin pruning even the tallest of our apple trees, big and small.  They climbed our prized and magical crabapple, which we hope to turn into delicious homemade hard cider this fall.


We have been doing all this clearing to make room for the garden (which is already in full production indoors!), but also for our new trees which are set to arrive in May.  We will be diversifying our fruit trees with the addition of some cherries, plums, pawpaws and we'll add some protein with walnuts, hazelnut and butternut.


Getting ready to transition to the greenhouse
Tomatoes nice and warm next to the stove
Meanwhile indoors, our garden grows. In the cold winter months I got to reading The Seed Starter's Handbook by Nancy Bubel (great book, part of the collection of farming books gifted to us by the previous family who lived here), and in order of plantings, we now have seedlings of onions, tomatoes, peppers, eggplants, celery, kale, basil, cabbage, lettuce, leeks and potatoes either sprouting in the greenhouse or next to the woodstove or already growing and luscious under the grow-lamps.  For the rest of the vegetable varieties we plan to grow, I think I will simply wait to do direct planting.

One cool technique that Sabrina and I started doing last year: pre-soaking the seeds in water, it works!  It's like starting sprouts, and this way you give your seeds a headstart.

The temperature inside the greenhouse already gets up to 95F (35C) in April, when its sunny all day, luckily Alex planned for good ventilation!

One exciting plan that is currently under way is the relocalization of the chickens to their permanent home.  We also got to reading the Permaculture Garden book by Graham Bell and the Edible Forest Gardens Vol II book by Dave Jacke during the colder months, and we got the idea from both these books, to design a chicken moat around our largest vegetable garden plot. By creating a gated 4 foot wide corridor all around the garden, where the chickens can roam, our new garden 'guardians' will be ridding us of any potential weed seed or most insects trying to enter our coveted food pantry, all while foraging for their food. 


So far we have moved them into the summer coop on top of the knoll, have created their pen, complete with roosts and access to the compost pile, and this week the rolls of 150 feet of 6 foot tall chicken wire will arrive.  Currently, the chickens are busy eating away at all the weeds that grow where the garden will be :) Thank you chickens! More on this project later...

And I leave you with these photos of Léo, who is now 10 months old :) has four teeth, will soon be walking without the help of the table or chair, and does poo poo in the potty everyday! It's the little things in life... ;)


Seems crazy I know, but he is really regular ;)
If you like what you read, you can follow us by email, add us on google+ or share with us your stories, or your own blog about homesteading or sustainable living, we'd love to see what others are doing.

Until next time, be well


Monday, April 8, 2013

Making our own sugar ;)

This spring we decided to have a go at making maple syrup, which we hope will in future be our main source of sugar.


Last spring we didn't tap any trees, first because we didn't know which ones were Sugar Maples, and second we didn't have our wood stove yet.  This spring, we decided it was worth a shot after speaking to my 93 year old grandma who recalled that when she was young her father always tapped the tree in front of their house and put the sap over the wood stove in the house.  What a brilliant idea: make syrup, use the sap evaporation process as a humidifier at the same time, and save the energy cost on top of that, because the fire is going anyways to heat the house.  Just brilliant.

We had so much maple water flowing that we drank it just like that

So we decided to tap some trees. Apparently Norway Maples aren't very good at making decent syrup, so we had to learn to differentiate the bark of Norways from potential Sugar Maples (or Silver or Red, which look a lot alike in the winter).  Turns out its really easy to tell them apart, and most of our Maples are Norway Maples, bummer!  But we did find a few old Maples that would fit the bill of a potential Sugar (or Silver or Red), so I tapped them.
Yum!
 Our big production, slowly evaporating on top of the wood stove

Even with only two taps, and probably a few days into the maple season, we managed to make at least two liters of syrup, not bad.

The snow is all gone, and the taps are out now... such a special time of year: the announcement of the beginning of spring. The signal that life is returning to the plant world, that everything is waking up from a long and restful winter sleep.  I am so happy and thankful the result is so sweet :)

Be well.

Sunday, April 7, 2013

Prepping the orchard: Wood, Air & Light!

After our November post about the orchard, here is an update of its progress. In the words of John Bunker all you need is new wood, air and sunlight, and the rest is up to you and your tree's individual personality and story.

Two weekends ago we had the very good fortune of hosting a MOFGA pruning workshop on our homestead, for very old apple trees.  John Bunker and Phil Norris were our instructors, about twenty people came, and it was a perfect day with warm sun rays and my very first sights of butterflies.

During this 4 hour course we learned about the best practices of pruning fruit trees (as opposed to pruning for powerlines or ornamentals who just need to look good), to maximize their fruit production, but also to bring back trees that have been left untended for quite sometime.

Being that our house was built circa 1840, we have some Old trees, and although they might look 'old' and dying, they are still kicking.  And it is possible to bring them back to interesting fruit production with a little help.
 
Our Russet before... sorry I don't have a better before picture
Our Russet being actively pruned :)
First, you want to assess the vigor of your tree, to determine whether or not it will do well with an intense makeover all at once, or if you could help it with some homemade braces under some branches to reduce the pressure of gravity on the main trunk, or even more important, whether or not the fruit is any good!  Have you tried it?  Lots of different apples can be used for different purposes -- fresh eating, sauce, baking, juice, cider, apple butter, animal feed, etc. -- but not all apples are worth all that work.  Especially if they are seedling trees (meaning it isn't a grafted apple variety but one that simply grew from a seed).  Seedling trees may be edible, but rarely delicious.  So the advice given to us was to first try the fruit of the seedling trees we have, and maybe if it's not all that interesting, to use the tree as a root stock to save, or simply multiply one of our other trees with a better fruit on it.

From what I understand, all apple cultivars we commonly know of by name are supposed to be genetically identical specimens to the original one.  That is because they are propagated through grafting or budding, grown from a twig of the original one, passed down from generation to generation.  That is the beauty of orcharding: even if your tree is old, and you think you might not be able to bring it back to life (because of a hollow trunk or a nasty wound) you can give it new life by grafting a piece of last year's new wood onto a new root stock, or fifty new root stocks!  Well that wasn't the focus of this specific workshop, but I am thankful for that option, as my dearest apple (that we have temporarily named the Ghost apple), is probably close to 150 years old and has a very hollow trunk and because of that, could, might, perhaps not survive that much longer (Gulp!).  For that reason Mr. Bunker saved quite a few scions (= new wood twigs) which he will transform into new grafted young and healthy Ghost apples for future generations to enjoy.
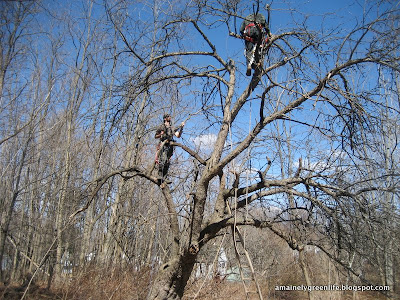
Alex learning the ropes on the ghost apple tree from Phil
The next thing you can think about when pruning, is pruning the other trees around your apples :) Do you have lots of Norway maples or other early pioneers or invasives slowly taking over your orchard?  Cut them back, and use them as lumber, firewood, woodchips, etc, and give more sun to your fruits!
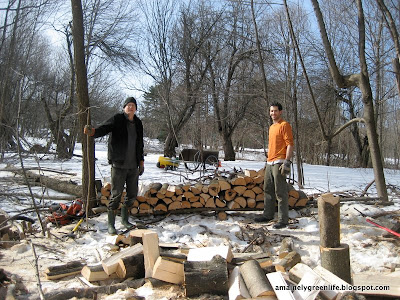
Alex and Ian, cording a Norway Maple that we took down to make room for the Ghost Apple
 Then dead wood is the easiest next step.  Remove all the dead branches, to give you a better, more accurate idea of what you will want to keep.  Then begin to remove what are called the Water Sprouts, the vigorous vertical branches that shoot straight up. 

Apple trees will never have fruits on vertical wood, never.  You need to have horizontal growth (or also otherwise called weak wood) to have fruits.  So if you see some younger vibrant growth shooting straight up, it might be a good sign that your tree is still very much alive, but you can go ahead and cut it off (remember it might seem extreme, but its not all for not, as you can also then remove last years growth on that branch to make scions :)). 
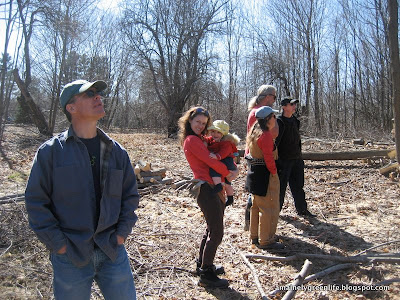
Sabrina came down for the workshop, and Léo in her arms :)
After removing adjacent trees, dead wood and water sprouts (thus taking care in part of the wood and sunlight aspects), we still have to keep cutting to create AIR.  You don't want any of your branches to touch, intertwine, or 'choke' one another.  So just like at the hairdresser, you want to layer the tree, and the analogy of a Christmas tree shape was used a lot, even though, with these olds gals, it might have to take a less symmetrical shape :) Obviously you want to encourage growth closer to the ground so you don't have to climb so high to get your fruit, so keep that in mind when you select the branches you will keep. An old adage is you want to cut enough to be able to throw a cat through the tree!

All cuts should be made directly next to a joint to allow the tree to cover the wound with bark. The two types of pruning cuts, heading and thinning are used for different purposes, but about 98% of all cuts we were told should be thinning cuts (cuts at a branching joint and not somewhere along a branch).

And I guess lastly, take your time, whether you are pruning for the first time or if you are an experienced apple orchardist...  As you open up new sunlight areas your tree might be telling you a different story next year, so think of the future, and don't be afraid to be gentle, there is always next year, or the fall.  With these older trees, don't be afraid to take your time, do the pruning in seasons, wait to see if new growth appears right on the trunk (as it will when you cut some of the top, thereby freeing some sunlight).

I say this because there is a saying, ''When you think you are done pruning, keep pruning!''. 

If you know some important tips about pruning, old or young trees, if you have comments, questions or stories about how you prune your trees, we'd love to hear from you :)

Til next time, be well!

Tuesday, December 18, 2012

Its begnning to look a lot like winter... ;)

Hourray! The first snow arrived yesterday and I was all smiles shoveling the front steps :)

It might not last very long because today its raining, but its always exciting to experience it again for the first time.

Alex has started chopping down more Norway Maples
 and splitting more firewood for next year


We have 15 overlapping glass panes left to install!

Lets be hopeful (and really idealistic!) that winter will give us a few more snow free, 40F days so we can continue to prepare the greenhouse... it's almost finished ;)

I have put all of our cherry and grape seeds in the freezer to mimic the winter dormancy period and actually speed it up, and next month they will be ready to start growing indoors, and who knows maybe in the greenhouse in the spring.  A little dreaming never hurt anybody!

We hope you are all enjoying the wintery blanket.

'Til next time, be well.


Monday, November 5, 2012

The greenhouse will be up and fonctional by winter!

Things seem to happen slowly but steadily as the fall season gives way to colder and colder weather.  It snowed for the first time today in our part of Maine.  In the last week we have managed to plant the garlic, onions and radishes already for next spring and covered them with a nice layer of dry leaves (we'll never have to buy mulch or wood shaving for the chicken litter, with the amount of leaves we have on this property), saved enough dry leaves for the chickens and most importantly of all...


before... putting in the ditches
after! Finally starting to take shape :)

We have begun to finish building the greenhouse.  Now that Alex has dug out the drainage system in and around the structure and we have put down enough garvel, we have started putting up the old and beautiful storm windows of the house as the back and side walls of the structure and started adding the finishing cedar planks and insulation to the front wall.  By the end of this week we should hopefully :) be done.

Look at those floor to ceiling storm windows, amazing!

Its going to be amazing!!!  As you can see there are barrels inside already.  Some of them will be used as passive solar heat sinks and other as rain barrels to collect the rain water from our roof. Our plan is also to route the dryer exhaust into the greenhouse so that when and if we use the dryer in the winter and spring, it will help to increase the heat and humidity inside the greenhouse.  One machine's waste heat will be our baby plants treasure I'm sure :)

True story: today, Léo and I took a walk around the property and we found a plethora of wild Oyster mushrooms growing on a dead tree. I have already quickly processed them into a yummy mushroom soup and dried the rest for later. yey wild foraging 2 minutes from our front steps!


Til next time,
Be well (and vote!)


P.S.: Remember remember the fifth of November
Gunpowder, treason and plot.
I see no reason why gunpowder, treason 

Should ever be forgot...
           - it was on this day in 1605 that Guy Fawkes
             tried to blow up the british parliament

Wednesday, April 18, 2012

Quest for energy sustainability (part II)

View before the transformation
The almost finished look


Getting closer and closer to Earth Day 2012, we have almost completed the transformation to a more sustainable source of energy for our heating system.  We have officially switched our house from an oil furnace to a wood burning stove and the restructuring of the new opening between the kitchen and the family room is nearly finished.

Boys in action, Barn raising weekend
Nothing better to accomplish this than a good old fashion 'barn raising' weekend with the family.  The locally sourced wood beams that the guys put up, truly give a new look to the space and the opening brings in more sunlight to the kitchen.  Now all we have to do is finish the look of the masonry on the chimney and build a bench ...

We did it, mostly by ourselves and with the help of many friends and family.  Home sweet home, without the oil!

'Til next time, happy Earth Day

Monday, February 27, 2012


Our Quest for Energy Efficiency...

As you all know the environment is something that Alex and I care about very much, and it has a large influence on our every day decision making.  From the food we buy to the trinkets we don't, we are always trying to minimize our environmental footprint.  3 months of living in this old house has quickly taught us that our energy consumption needs further scrutiny. Maine happens to have the highest energy costs in all of new england, weighing in at 15.4 cents per KWH! So, our investigations will not only aide nature but also our pocketbooks.

Currently our home, like most in the US, is heated with #2 home heating oil. After much research (Wood Heat by John Vivian - Rodale Press 1978 is a must read), and many fire-side experiences, we have decided to install a wood stove as our primary heating source.  To quote from Vivian, '...we welcome the environmental benefits and freedom from Exxon and its sisters that our willing wood labor brings as much as an earlier generation welcomed the relief from forced labor brought from the kerosene range.' Even if natural gas was available in our neighborhood we believe that wood trumps all carbon based, mined substances. For more info on the availability of fuels and energies in general, we highly recommend reading the Post Carbon Reader.

With many helping hands we have exposed the bones of one of our two chimneys (between the kitchen and dining room - see picture from last post). A vain attempt however was made on top of the roof by Alex and his friend Drew last weekend. After figuring out a safe means of standing eye level with the top of the chimney they began hammering and chipping at the corner brick of the 160 year old chimney. They huffed and they puffed with rock-hammer and chisel but not a single dent could be made. Pretty incredible really. Score: ambitious energetic home-owners: 0, rock solid like-new chimney: 1! So as the old adage goes, and on the path to true permaculturalism, why fix something that isn't broken? Instead we shall put it to use once again. The true fun now begins as we design the hearth and mantle piece :). 
Up on the roof. The picture makes it look like we're working off the dormer, but nope...we're a good 5 feet off the steep pitch ;). Ain't nothing for a pair of rock climbers!

View down the main chimney. Pretty clean for 140 years old.
We expect the new Hearthstone Equinox - yeah the big daddy - to arrive soon, so all you arborists out there, we're willing to start trading eggs and summer shares of our produce for wood. That being said, we're also in the market for a chain-saw to hopefully supply at a minimum our first years fuel from our somewhat untidy land :P.
Not the big daddy. Just a space holder as we wrap our heads around th best orientation.

Solar energy is the most obvious winner in terms of sustainability. We have therefore consulted with some experts to calculate our homes potential for both thermal (hot water) and photovoltaic solar power generation. Hot water was not worth it, but with the government tax credits of 30%, there is an approximate payback period of 6 years to install solar panels. Our roof can accomodate about 8 full size panels, with the capacity to generate about $20 of energy per month. The surprise is that no batteries are needed in these systems anymore. An inverter simply feeds your house with solar energy and if you don't use it, it feeds the grid (and reduces your bill towards negative!). Decentralized green power generation is here...we shall all play a part in the revolution.

After mapping our circuit board to each electrical switch and outlet in the house - really just an adult game of cell phone walkie talkie and flashlight hide and seek - we have purchased a kill-a-watt meter to better understand where and how much electricity we use. The only determination we have made so far is TOO MUCH. We've taken the most important steps however, changing all the light bulbs for efficient CFLs and LED bulbs and purchased a new energystar fridge. Some frightening research on the energy consumption of our old 1970s fridge made the payback calculation quite simple (2.4 years!). We also felt as if we were putting an ailing patient out of it's own misery when the energy conservation NGO EfficiencyMaine came to recycle our old fridge as it would not cease to make agonizingly effort-filled groaning noises. We were even paid $50 dollars for them to recycle it.

EnergyStar gives a handy dandy little calculator if anyone else wants to see how much they spend per year on their refrigeration. We reduced our expense from 400$ to 57$. Our friend Mel also sent us this great article by TreeHugger on other ways than refrigeration to conserve and preserve fresh food, you should check it out.  There were other incentives to make the upgrade as well. You should check your respective local and state programs if you're interested.

We are sorry it took so long to write our second post, but the next one is coming shortly.  To wet your whistle about the upcoming post...what do a 1 horse power tiller, 25 pounds of natural bees wax and a hanging chair have in common? :)...until next time, be well everyone and stay green.